🕐9 min read
Disclosure: This post contains affiliate links. If you click through and make a purchase, we may earn a small commission at no extra cost to you. Thank you for supporting this site!
Most women who own a gua sha tool use it incorrectly. They drag it across barely-lubricated skin, apply uneven pressure, and skip the foundational work on the neck and décolletage that makes facial sculpting actually effective. The result is frustration, minimal visible change, and a beautiful stone collecting dust on the bathroom shelf. This is not a failure of intention but of instruction. A 2021 study published in the Journal of Cosmetic Dermatology found that consistent facial massage techniques—including gua sha—improved cheek lifting by an average of 2.3 millimeters over eight weeks when performed correctly with adequate slip and directional protocol. The difference between a casual swipe and a ritual that produces measurable results lies in precision: the angle of the tool, the pressure applied, the sequence of movements, and the quality of the products used to facilitate glide. This is not about more effort. It is about more deliberate effort. What follows is a complete, 10-step luxury facial gua sha ritual designed to deliver professional-level sculpting at home, with specific product recommendations, pressure point maps, and layering protocols that honor both the science and the sacredness of the practice.
Choosing Your Stone: The Foundation of Practice
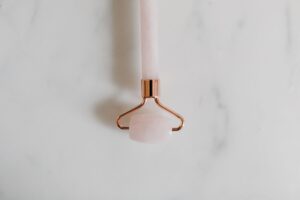
The tool you select determines the quality of your experience and the depth of your results. Not all gua sha stones are created equal, and the material, shape, and weight of your tool directly affect how pressure transfers to the tissue beneath the skin. Bian stone, a jadeite-rich metamorphic rock sourced primarily from Shandong Province in China, has been used in traditional Chinese medicine for over two thousand years and is prized for its high density and ability to retain cool temperatures. A bian stone tool from Mount Lai retails at \$78 and weighs approximately 85 grams—substantial enough to provide deep, controlled pressure without requiring muscular effort from your hand. Rose quartz, by contrast, is softer and lighter; a typical rose quartz gua sha from Herbivore costs \$36 and weighs around 55 grams, making it better suited for sensitive or reactive skin types where gentler pressure is indicated.
The shape of the tool matters as much as the material. A classic heart-shaped gua sha with a long curved edge, a shorter curved edge, a notch, and a straight edge offers four distinct contact points for different facial zones. The long curved edge is designed for the jawline and cheekbones; the shorter curved edge fits the under-eye area and brow bone; the notch hooks into the jaw angle and clavicle; and the straight edge works the neck and décolletage. Lanshin’s Pro Tool, priced at \$165, adds a fifth contact point—a micro-curved tip specifically engineered for the nasolabial fold and the medial canthus of the eye. If you are investing in your first high-end tool, choose bian stone or rose quartz with at least four distinct edges. Avoid resin or acrylic tools, which lack the thermal conductivity and weight necessary for effective fascial release.
The Preparation Ritual: Cleansing and Priming the Canvas
Gua sha performed on insufficiently prepared skin is not merely ineffective—it can be damaging. The stone must glide across the surface without dragging, pulling, or creating friction against the epidermis. This requires a minimum of three to four milliliters of a high-slip facial oil or balm, applied to damp, freshly cleansed skin. Begin with a double cleanse: an oil-based cleanser to dissolve sunscreen and sebum, followed by a water-based cleanser suited to your skin type. For the oil cleanse, Joanna Vargas’s Daily Cleansing Oil (\$52 for 150 ml) uses a blend of jojoba and sunflower seed oils that break down makeup without stripping the barrier. For the second cleanse, consider a low-foam gel like Odacité’s Green Smoothie Cleanser (\$49 for 120 ml), which contains aloe vera and papaya enzymes for gentle exfoliation without disrupting the acid mantle.
Once the skin is clean and still slightly damp, apply a hydrating serum to create a base layer of slip and active ingredients. This is the moment to introduce treatment-specific products that will be pushed deeper into the tissue by the mechanical action of the stone. A 5% niacinamide serum—such as The Ordinary’s Niacinamide 10% + Zinc 1% (\$6.50 for 30 ml) or Paula’s Choice 10% Niacinamide Booster (\$44 for 20 ml)—supports barrier function and pore refinement while the gua sha enhances penetration. Follow with three to four drops of a facial oil formulated for glide. Mount Lai’s De-Puffing Facial Oil (\$54 for 30 ml) contains rosehip seed oil, squalane, and ginger root extract; its texture is substantial enough to provide slip for a full ten-minute ritual without reapplication. If your skin is prone to congestion, choose a lighter oil such as Sacheu’s Lavender Adaptogenic Face Oil (\$38 for 30 ml), which uses grapeseed and meadowfoam seed oils that absorb without leaving a tacky residue. Apply the oil in upward, outward strokes with your hands before picking up the stone—this pre-warming step signals to the nervous system that the ritual has begun.
Neck and Décolletage: The Base of the Lift
The most common mistake in facial gua sha is starting on the face. The neck and décolletage form the structural foundation of the face; tension and lymphatic congestion in this area pull downward on the jawline and cheeks, undermining any lifting work performed above. Begin with the neck, using the straight edge of your stone held at a 15-degree angle to the skin. Apply light to medium pressure—enough to feel the edge engage the tissue, but not so much that the skin wrinkles in front of the tool. Start at the base of the neck, just above the clavicle, and stroke upward along the sternocleidomastoid muscle to the angle of the jaw. Repeat this movement ten times on each side. The lymphatic drainage points here are dense: the supraclavicular nodes sit just above the collarbone, and stimulating them with a gentle, sustained press of the stone for three to five seconds before beginning the strokes can significantly improve fluid movement.
Move to the décolletage by switching to the long curved edge of the tool. Apply a small amount of additional oil if the skin feels tacky—décolletage skin has fewer sebaceous glands than the face and tends to absorb product more quickly. Begin at the center of the chest, just below the sternal notch, and stroke outward toward the shoulder, following the line of the collarbone. Perform eight strokes on each side, then repeat with the stone angled slightly upward to address the upper pectoral area. This region often holds tension from desk work and screen use; you may feel small release points where the tissue softens under repeated passes. If you use a retinol product at night—such as SkinCeuticals Retinol 0.3% (\$64 for 30 ml)—apply it after the gua sha ritual rather than before, as the mechanical stimulation can increase absorption and potentially cause irritation if retinol is already present on the skin. Wait at least fifteen minutes after the ritual to apply retinol, allowing the skin to settle and the oil to partially absorb.
Jawline and Chin: Defining the Lower Face
The jawline is the area where most women expect to see the most dramatic results from gua sha, and for good reason: the masseter muscle, which runs from the cheekbone to the lower jaw, can hold significant tension from clenching and grinding, and the lymphatic network beneath the jaw is prone to congestion. To address both, use the notch of your gua sha tool. Hook the notch under the jawbone at the midline of the chin, with the stone held at a 30-degree angle so that the upper edge presses into the soft tissue beneath the mandible. Stroke outward along the jawbone toward the ear, moving in a single, continuous motion. Repeat twelve times on each side. The pressure here should be firmer than on the neck—you are working against muscle and bone, not fragile tissue. You should feel a distinct sensation of the stone engaging the fascia, but never pain or sharp discomfort.
After completing the jawline strokes, address the chin itself. Switch to the short curved edge of the tool and place it at the center of the chin, just below the lower lip. Stroke outward toward the jaw angle, following the curve of the chin bone. Perform six strokes on each side. This movement targets the mentalis muscle, which can become overactive and create a dimpled appearance in the chin area. If you have a tendency toward fluid retention in the lower face—common in the week before menstruation or after a high-sodium meal—spend an extra two minutes on this section, focusing on the area directly beneath the earlobe where the parotid lymph nodes sit. Press the stone gently into this point for five seconds at the end of each stroke, then release. This sustained pressure signals the lymphatic vessels to contract and move fluid away from the face, which is why many women notice a visible reduction in jawline puffiness after a single thorough session.
Cheekbones and Midface: The Sculptural Lift
The cheekbones are the architectural center of the face, and the gua sha technique here differs from the linear strokes used elsewhere. Instead of long, sweeping movements, the midface requires a series of shorter, anchored strokes that follow the bone structure and lift the tissue upward and outward. Begin by locating the zygomatic arch—the cheekbone that runs horizontally from the side of the eye toward the ear. Using the long curved edge of your stone, place it at the highest point of the cheekbone, just below the outer corner of the eye. Stroke upward and slightly outward toward the temple, following the natural lift line of the cheek. Repeat eight times on each side. The angle of the stone matters critically: if the tool is too flat against the skin, it will compress the tissue rather than lift it; if the angle is too steep, the edge will dig in uncomfortably. A 20-degree angle is the sweet spot for midface work.
Next, address the nasolabial fold area, which requires a different tool edge. Use the micro-curved tip if your stone has one, or the short curved edge if it does not. Place the tool at the base of the nasolabial fold, just beside the nostril, and stroke outward and slightly upward toward the cheekbone. This is not a movement that erases the fold—no topical technique can do that—but it does soften the appearance of the fold by releasing the fascia that can tether the tissue downward. Perform six strokes on each side, then switch to the straight edge for a broad cheek lift. Start at the center of the cheek, just below the eye, and stroke upward toward the temple in a fanning motion. This movement should feel expansive, as if you are opening the face rather than compressing it. For added precision, apply a retinol 0.3% product—such as La Roche-Posay Redermic R (\$45 for 30 ml)—on alternate nights after the ritual, allowing the increased circulation from the gua sha to enhance cellular turnover without risking irritation from daily use.
Forehead and Brow: Releasing Tension
The forehead is often overlooked in gua sha routines, yet it is one of the areas where the practice delivers the most immediate sensory reward. The frontalis muscle, which runs vertically across the forehead, is frequently held in a state of low-grade contraction due to unconscious expression—raised brows, squinting, frowning—and the fascial restrictions that result can contribute to horizontal line formation and a heavy sensation across the brow. Begin by applying an additional drop of oil to the forehead, as this area tends to absorb product more quickly than the cheeks. Using the straight edge of your stone, start at the center of the forehead, just above the brow bone, and stroke upward toward the hairline. Repeat this movement ten times, working from the center outward in a zigzag pattern so that the entire forehead is covered. The pressure here should be lighter than on the jawline—the frontal bone is more superficially positioned, and the tissue is thinner.
After the vertical strokes, address the brow bone itself. Switch to the short curved edge of the tool and place it at the inner corner of the brow, where the brow meets the bridge of the nose. Stroke outward along the brow bone toward the temple, following the natural curve of the bone. Perform six strokes on each side. This movement targets the corrugator supercilii and orbicularis oculi muscles, which are responsible for furrowing between the brows and squinting. You may notice that the area around the inner brow feels particularly tight or tender—this is a common holding pattern for tension. If you encounter a point of resistance, pause and hold the stone gently against the spot for five to eight seconds, breathing
Reclaim Your Inner Seasons
Cycle wisdom, sacred rituals, and phase-aligned self-care — rooted in tradition, delivered to your inbox.
No spam. Unsubscribe anytime.